Purpose: This guide provides Chat Agents with the steps to assist merchants in clearing transactions from the "Do Not Allow" list, which is designed to prevent merchants from processing payments with invalid or inaccurate account information.
Overview of the "Do Not Allow" List
When our system receives specific return codes (e.g., R02, R03, R04, R05, R06, R07, R08, R10, or R29), it places the TRN/DDA (Transit Routing Number/Direct Debit Account) combination on the "Do Not Allow" list. Any future attempts to process transactions with that TRN/DDA combination will automatically decline with an “Account Not Approved” status.
Decline Codes:
- U02 – Account Not Approved(non-Forte Validate+ transactions)
- The transaction can be retried immediately after clearing (upon merchant request).

- U80 – Account Not Approved(Forte Validate+ transactions)
- The transaction can be retried 24 hours after clearing, as Forte Validate operates based on the previous business banking day. Attempts before the 24-hour window may still decline.


Steps for Clearing a Transaction from the "Do Not Allow" List
- Locate the Declined Transaction
- Use Dex or Webtools to locate the transaction and view the details. (Refer to the screenshot examples of U02 and U80 transactions for guidance.)
- Verify Authorization Status
If the decline was due to return codes R05, R06, R07, R08, R10, or R29:- Ask the Merchant if they have a new authorizationfor the transaction:
- If No: Inform them that a new authorization is required before clearing the account.
- Canned Response, short code (DNA):
- Ask the Merchant if they have a new authorizationfor the transaction:
It looks like your transaction was declined because of missing or invalid authorization. Before we can clear this account for future transactions, we’ll need new authorization for your records.
|
- If Yes: Proceed to the next steps to clear the verification.
- Clear the Verification in Webtools
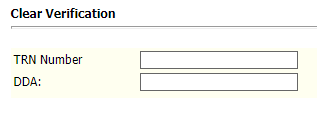
- Go to the Transactions tab in Webtools and select Clear Verification.

- Enter the declined transaction’s routing and account number in the appropriate fields.
- Click Update to submit the information.

- Confirm Clearing Status
- If the transaction was successfully cleared, you’ll see a confirmation message in red. If it wasn’t cleared, the message will indicate it remains on the "Do Not Allow" list.
- Note: Once cleared, transactions with a U80 code will require a 24-hour wait before reattempting.

